This post is sponsored by Joss & Main and contains affiliate links
When we bought our home three years ago, we knew that we needed to have a dedicated guest room because grandparents regularly stay with us. However, we didn’t design the space at all … and in fact, our daughter decided that the cat painting she made at a birthday party would be perfect above the bed.
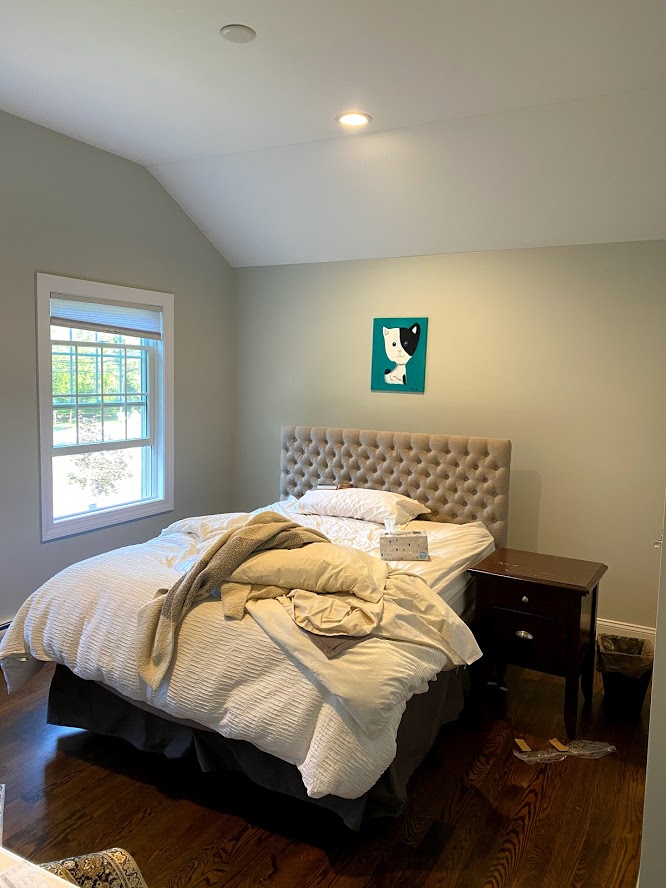
So, when Joss & Main approached me about a bedroom refresh, I knew exactly where I’d want to start… (a) a rug to ground the space aesthetically and define the color foundation of the room and (b) paint / feature wall (a #zerodollarupdate using leftover paint I had on hand!).
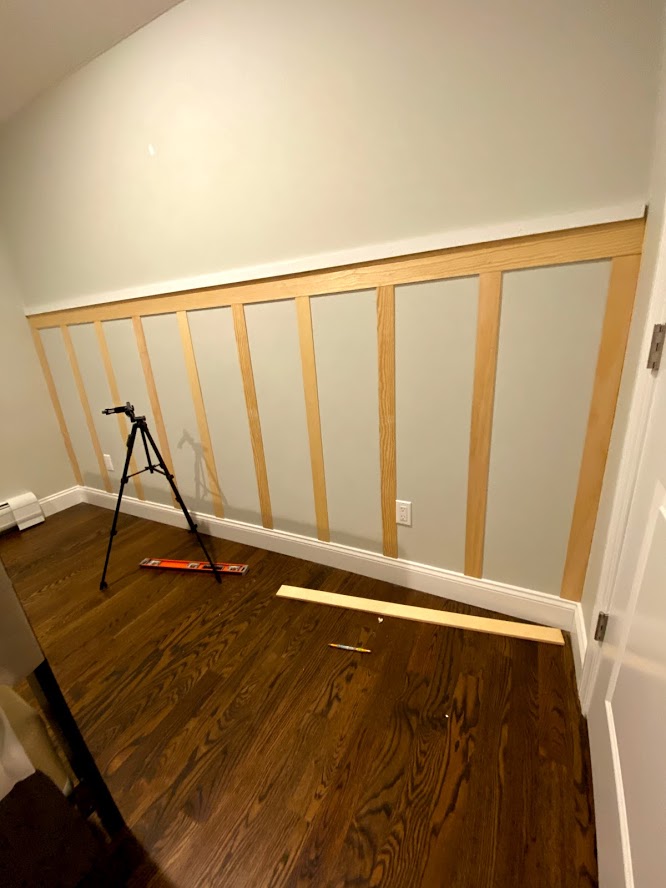
Board & Batten
One of the most frequently asked questions I get about my board and batten is the size of each board. I used a similar technique to my mudroom to add a simple, thin-profile board and batten wall treatment with about $50 worth of materials for a wall that is about 10′ wide. Since I did not want to remove my existing baseboards, I needed to find vertical boards that would be thin enough not to overhang. Lattice molding is the perfect solution – at only 1/4″ thick, it sits flush with my existing baseboards. Here are a couple of options from The Home Depot: 1 1/2″ Primed (link) and 1 1/2″ unprimed (link). I wanted slightly wider boards which the big box retailers did not carry… but thankfully found options from a local lumber supplier, Kuiken Brothers. The buying experience is a little different and slightly more intimidating than going to a big box home improvement store… but they are incredibly friendly, knowledgeable, and have a much wider range of trim options – including several widths of lattice trim (see all options here).
Here are the exact dimensions I used:
- Verticals battens: 2 5/8″ W lattice trim
- Horizontal boards: 3 1/2″W lattice trim
- Top (cap): Primed 1×2″
To begin, mark all of your studs so that you can nail the horizontal board into studs. I love this stud finder!
I recommend starting with the 3 1/2″ horizontal board first – this is the only part of the project where I needed an extra set of hands. Level it and nail it in with a nail gun (I used the Dewalt 18ga nail gun which I love!).
The battens go up super fast! Once they’re up, caulk all of the seams so that the end result will look smooth and neat. I primed all the boards that were raw (always prime raw wood!)… and then painted it with the leftover Benjamin Moore Dark Pewter paint I had from my office project.
DIY Wallpaper
I’ve been wanting to try out the ever popular sponge wall treatment somewhere in my home. When I saw this pattern from @anappetitefordesign, I knew I wanted to try something similar:
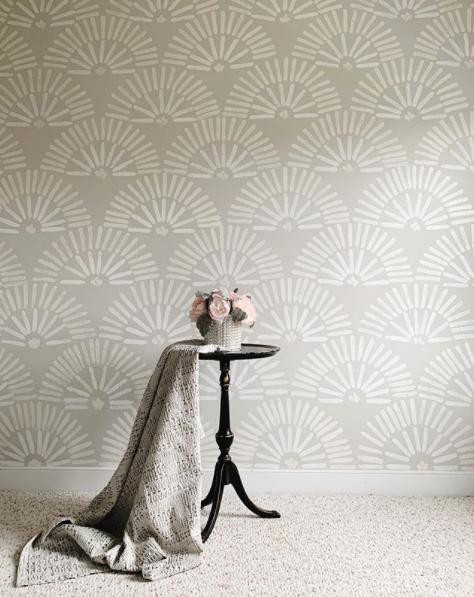
I used leftover paint and created a design… that I initially hated (it reminded me a lot of a wall of boobs tbh…!) — but it’s grown on me over time. I love how the accent dots pull in the color of the lower half of the wall.


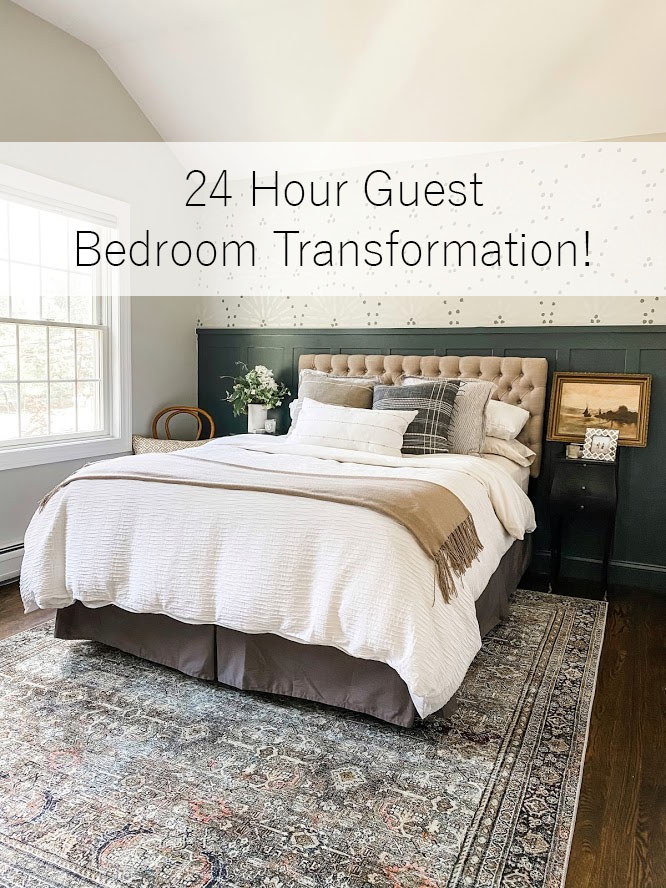
The Reveal!
With the feature wall finished in just about 24 hours, I finished styling the room with this new rug and check out their incredible full rug selection here! I’ve been eyeing this design for a while – I love all the colors and the vintage look. I added two black nightstands that I thrifted and refinished months ago with General Finishes Milk Paint in Black Lamp.
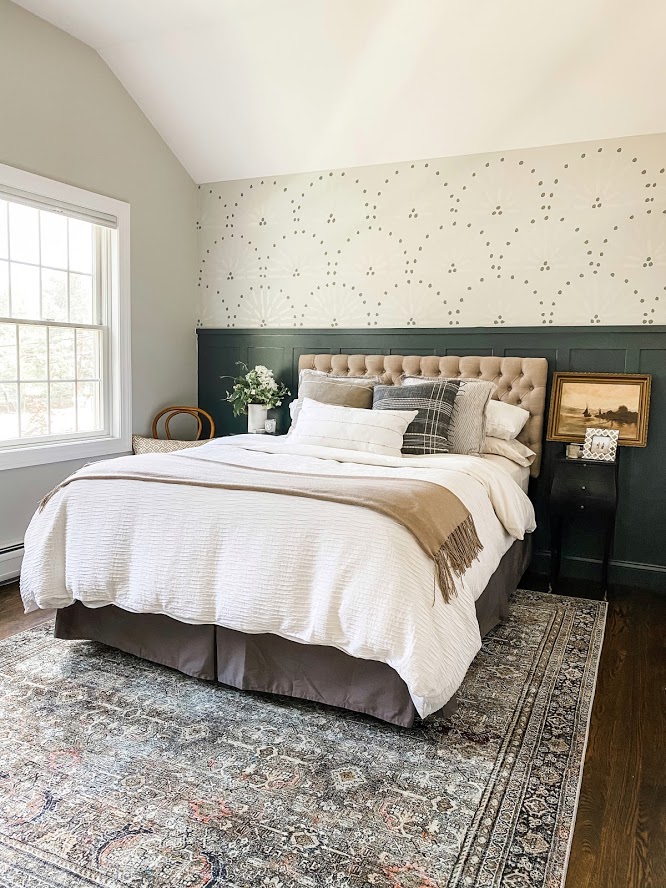
When I showed the newly refreshed room to my first guest, my mom, she said she LOVED it (and she’s a tough one to please sometimes… :))! I still want to add a few more design elements in here — sconces, window treatments, desk, art… but I’m so happy with how this room came out. Is there a room in your home that could use a 24 hour makeover??