Looking for a fun, creative craft to make your Galentine’s Day celebration even more special? Or perhaps you want to add a personal touch to any occasion? Whether it’s a birthday, holiday, themed party, or just for a custom touch for your home or apartment, creating custom matchbooks is a simple yet stylish way to bring a fun twist to any event! I’ve always loved when restaurants have a custom matchbooks at the hostess stand as a fun little freebie take-home collectible! I’ve always thought they’d be difficult or costly to make, but I found the perfect DIY to make unique, custom matchbooks for any and all occasion using a few shortcuts, a little creativity and cheap supplies from Amazon and the Dollar Tree! I promise these little matchbooks will create a huge WOW factor and personal touch that all your friends and guests will be asking you for!
In this blog post, I’ll show you step-by-step how to create your very own custom matchbook using a pre-designed and free Canva template, with easy-to-follow instructions to print and make your own party favors! Perfect for crafting alone or with your best friends, these matchbooks make an unforgettable gift, party favor or home decor.
Supplies You’ll Need:
- Plain Matchbooks: Find these at Dollar Tree or online on Amazon. These small matchbooks are perfect for crafting and are available in bulk, making them ideal for party favors.
- Matte Inkjet Sticker Paper: Printable sticker paper is essential for transferring your designs from Canva to your matchbook. Make sure to choose high-quality matte inkjet sticker paper for smooth prints and vibrant designs.
- Scissors or Paper Cutter: For trimming your printed designs to fit perfectly on the matchbook.
- Matchbook Printable Design (click below to download and print PDF): Feel free to download this PDF and print my existing design OR you can design your own template in Canva (sign up with a free account).
Step-by-Step Guide: How to Make Your DIY Custom Matchbooks
Step 1: Gather Your Supplies
Before diving into your design, make sure you have all the supplies listed above. I like to buy these blank matchbooks in bulk on Amazon, however if you live near a Dollar Tree feel free to purchase the Diamond brand matchbooks since they are the same dimensions. Also be sure to double check that your matte inkjet sticker paper is compatible with your printer for the best results.
Step 2: Create Your Matchbook Design
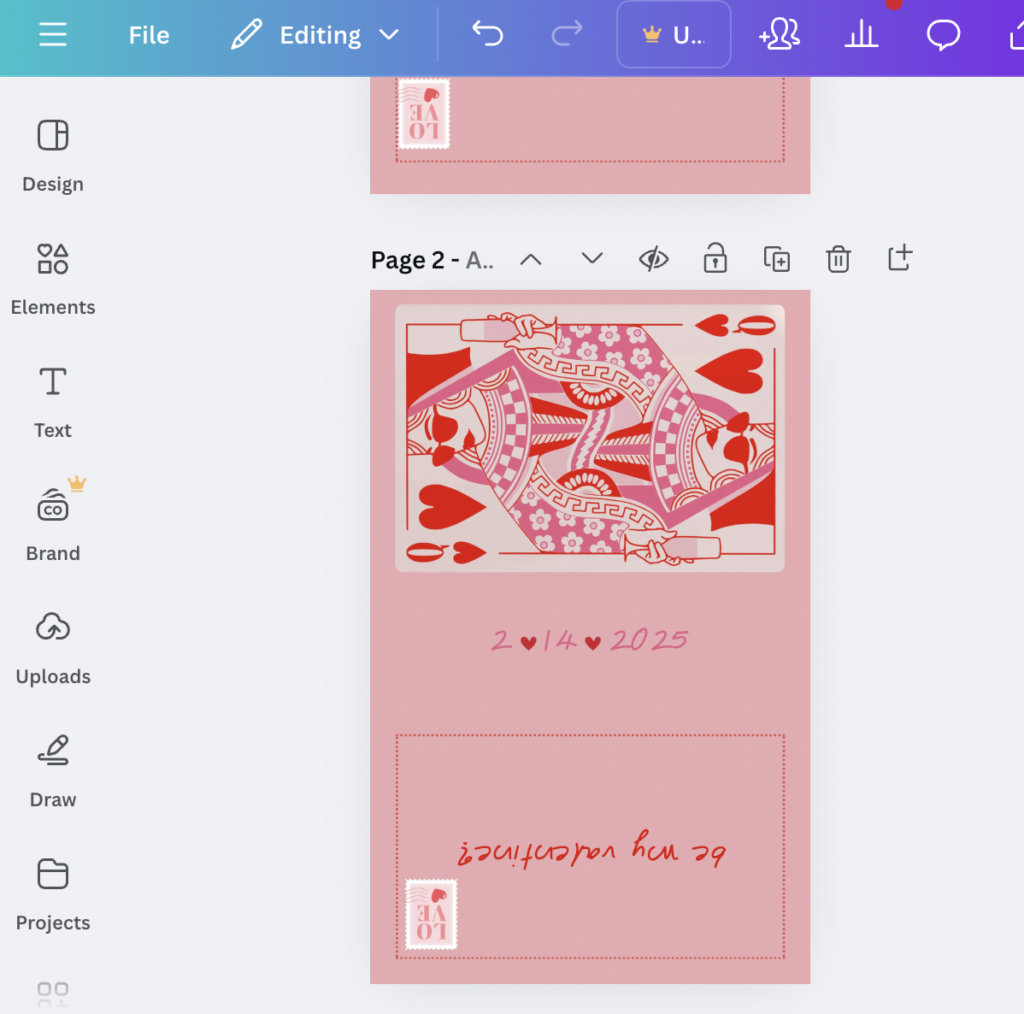
If you’re looking to get the exact look of my Valentine’s Day matchbooks, feel free to download and print the PDF as-is, but if you’re feeling creative then feel free to create a free Canva account (or log-in if you already have) and create a custom design with the dimensions “2.063 in x 3.25 in” for the standard matchbook sizes that I have linked above. Canva offers many pre-made templates or you can create your very own design based on the theme, occasion or look you’re going for! I love scrolling through Pinterest for design inspiration.
Tip: When creating your design, make sure to rotate the bottom half of your design by 180 degrees, so that once it’s printed and added to the matchbook, both sides have text written right-side up.
Step 3: Print Your Design
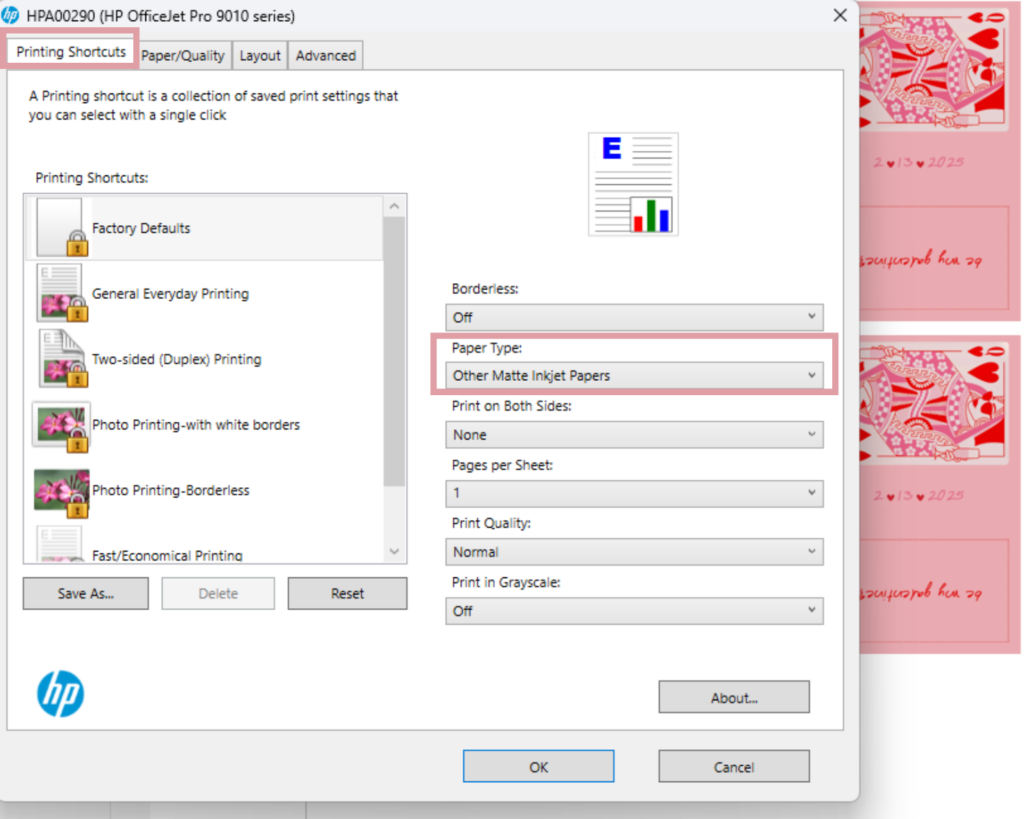
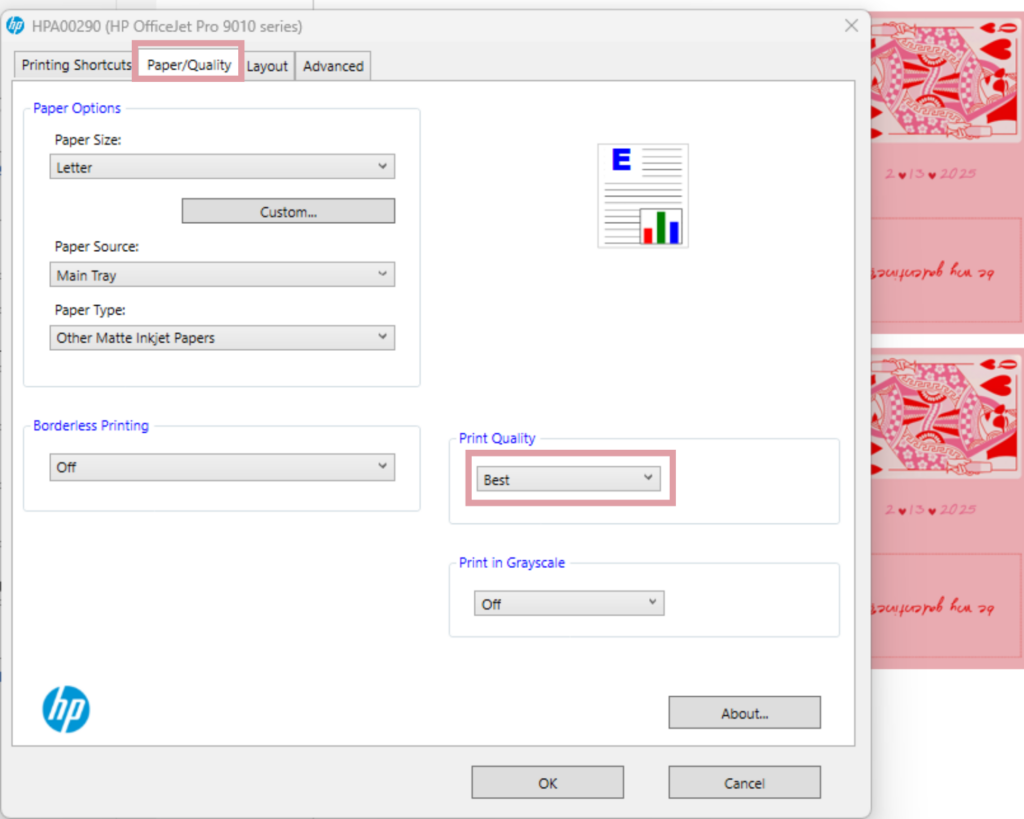
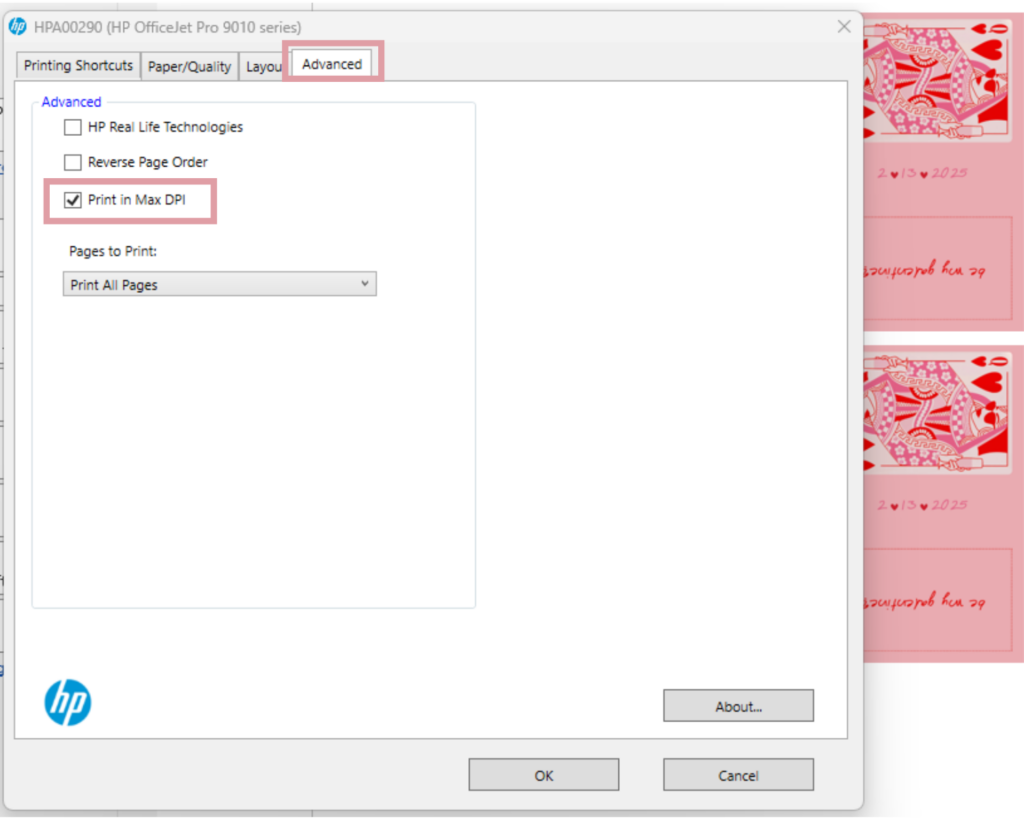
Once you’re happy with your design, it’s time to print. Load your matte inkjet sticker paper into your printer and ensure you’re using the correct settings. These are the settings I like to change to ensure the highest quality result:
[Setting 1] File -> Print -> Printer Properties -> Printing Shortcuts -> Paper Type -> Other Matte Inkjet Papers
[Setting 2] File -> Print -> Printer Properties -> Paper/Quality -> Print Quality -> Best
[Setting 3] File -> Print -> Printer Properties -> Advanced -> Print in Max DPI
Once your settings have been updated, carefully print out your designs! Allow the ink to dry for a few minutes before moving on to the next step to avoid smudging!
Step 4: Cut and Apply the Sticker
After printing, it’s time to cut out your matchbook designs. You can use scissors for precise cutting, or a paper cutter for a cleaner, more uniform cut.
Peel off the backing from the sticker paper and carefully stick it onto the front side of your matchbook. Start by lining up the top, then crease the edges, and wrap around!
Why This Craft is Perfect for Galentine’s Day and Beyond
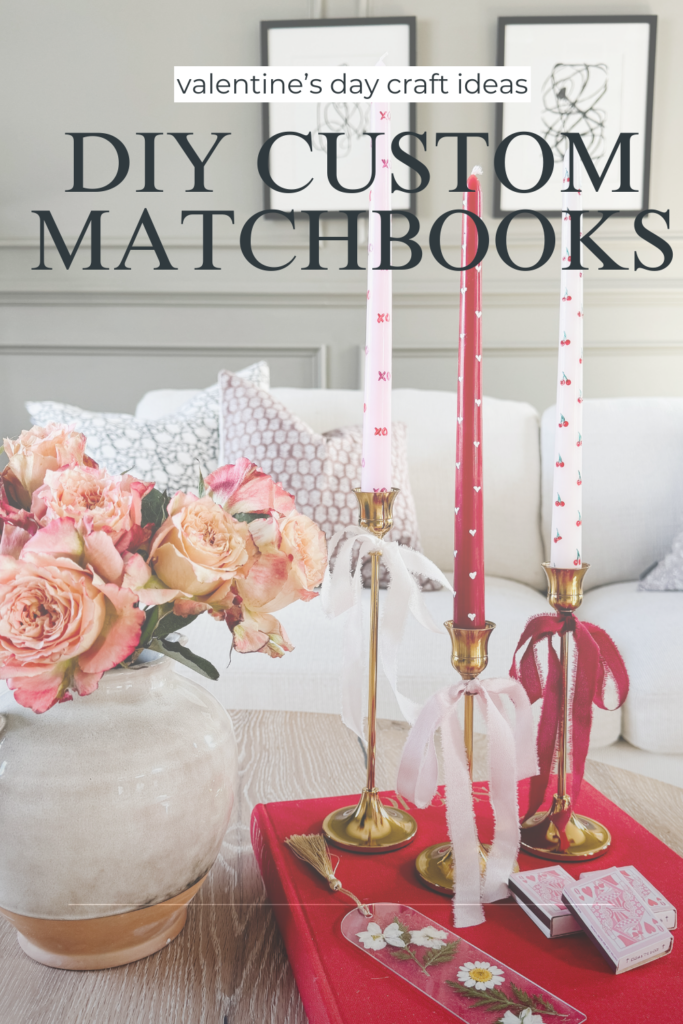
Creating personalized matchbooks is a fun, inexpensive craft that can be customized for any occasion! For Galentine’s Day, it’s the perfect way to show your friends how much you care, while adding a festive touch to your party favors. You can even use different themes for other holidays like Valentine’s Day, birthdays, or even bridal showers. For more Valentine’s day craft ideas, follow along for my painted candlestick and dried flower bookmark tutorials!
Gather your supplies, get creative, and enjoy making these thoughtful keepsakes that everyone will love!