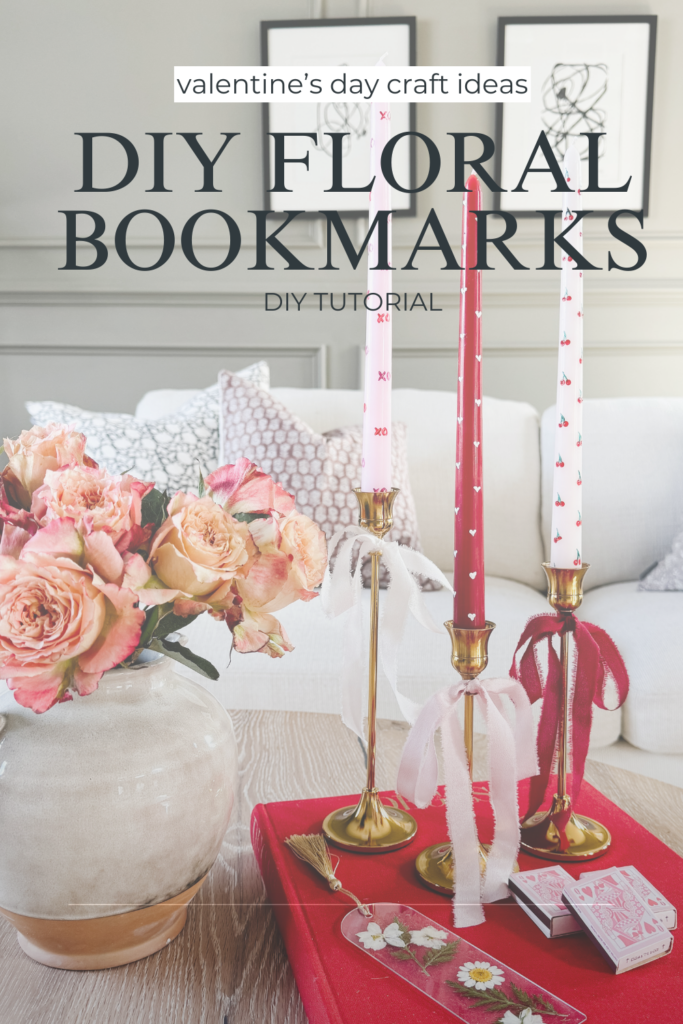
Valentine’s Day is fast approaching, and if you’re on the lookout for a fun, personalized craft to make for loved ones, friends, or even yourself, this dried flower bookmark is the perfect solution. Not only is it a creative and beautiful gift, but it’s also versatile enough to suit any occasion—whether it’s a book club gift, a girls’ craft night project, or a sweet holiday or birthday surprise for the book lover in your life.
This step-by-step guide will walk you through how to create a stunning dried flower bookmark. Plus, you can personalize it by adding meaningful quotes, making it an even more heartfelt gift. Whether you’re celebrating Valentine’s Day or just want to create something special, you can’t go wrong with this easy-to-make, eco-friendly bookmark!
Supplies You’ll Need for Your Dried Flower Bookmarks:
- Acrylic Bookmark Kit (including acrylic bookmark and tassel) – this kit is all you need for the base
- Tweezers – To arrange and place the delicately dried flowers
- Mod Podge Gloss – This will act as the adhesive to secure the flowers
- Paintbrushes – For applying Mod Podge and smoothing out the flowers
- Dried Flowers – Your choice of botanicals! You can use flowers like lavender, pressed roses, or even herbs like eucalyptus
- Optional: Quotes
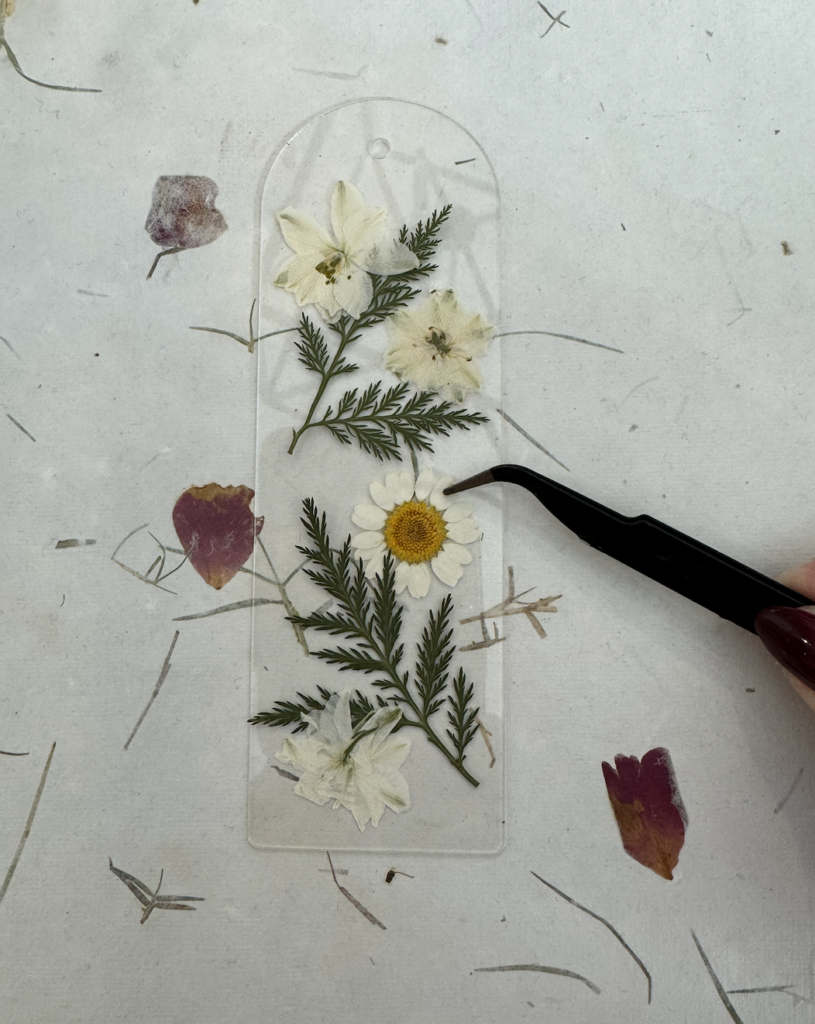
Step 1: Arrange Your Dried Flower Bookmark Materials
Start by grabbing your clear acrylic bookmark and placing it on a flat, clean surface. This is where the fun begins—arranging your dried flowers! Using the tweezers, delicately place each flower on the bookmark in whatever layout pleases you. Don’t rush it; you can always tweak the arrangement until it looks just right. Let your creativity flow!
Tip: If you’re hosting a craft night for multiple people, feel free to buy dried flowers in specific colors to stay on theme, along with any quote stickers or other themed items you have in mind! I love adding in a variety of sizes, textures, colors and patterns!
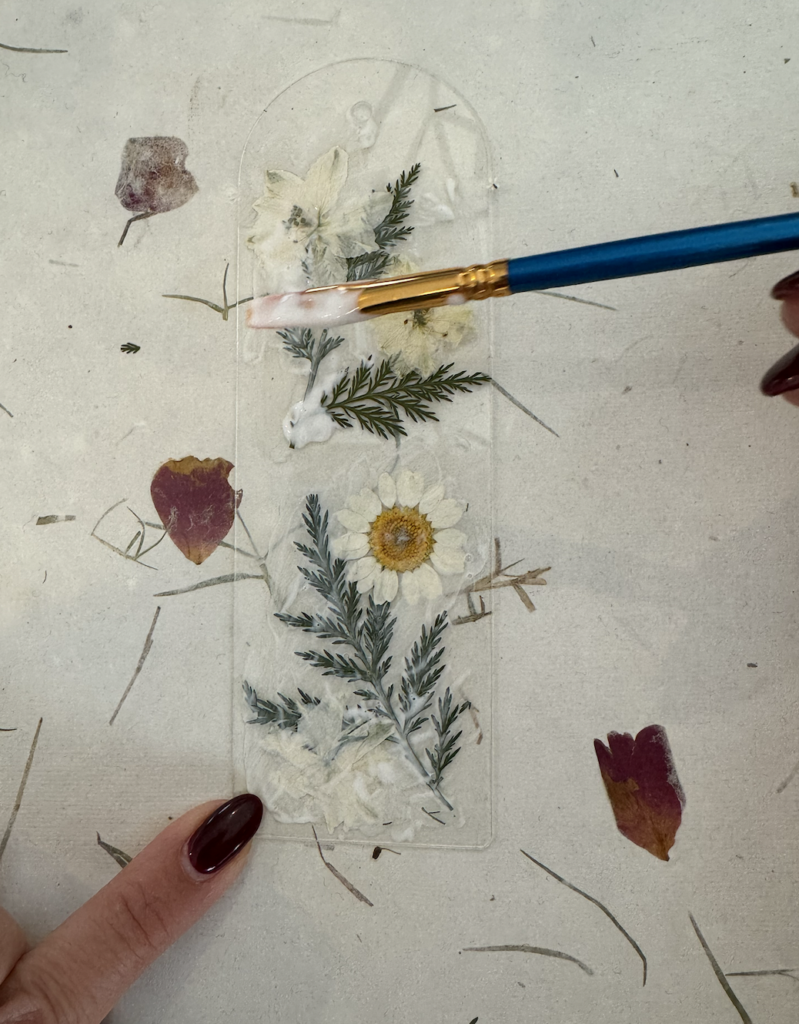
Step 2: Secure Your Flowers with Mod Podge
Once you’re happy with your flower placement, it’s time to secure them in place. Dip your paintbrush into the Mod Podge and gently lift each flower with the tweezers, applying a thin layer of Mod Podge underneath it. Don’t worry about being too perfect—just cover the space where the flower will sit, and be sure to let each flower rest in place as you go. It’s often helpful to divide your bookmark into sections, painting one part of the bookmark at a time to keep it organized.
You’ll have around 30 minutes before the Mod Podge starts drying, so be sure to work quickly but carefully. The goal is to ensure that each flower is adhered properly.
Step 3: Seal the Dried Flower Bookmark with Mod Podge
Now that your flowers are securely attached, it’s time to add a protective layer of Mod Podge on top. Using a clean paintbrush, gently dab the Mod Podge over the flowers. Make sure to use a light touch—no brushing motions, as this can disturb the delicate flowers underneath. Just dab carefully until the flowers are well-coated. This will not only help keep them in place but also give them a nice glossy finish.
Step 4: Let It Dry
Let your beautifully decorated bookmark dry for about 30 minutes, or until the Mod Podge is completely clear and dry to the touch. Don’t rush this step; the longer you let it dry, the more secure the flowers will be.
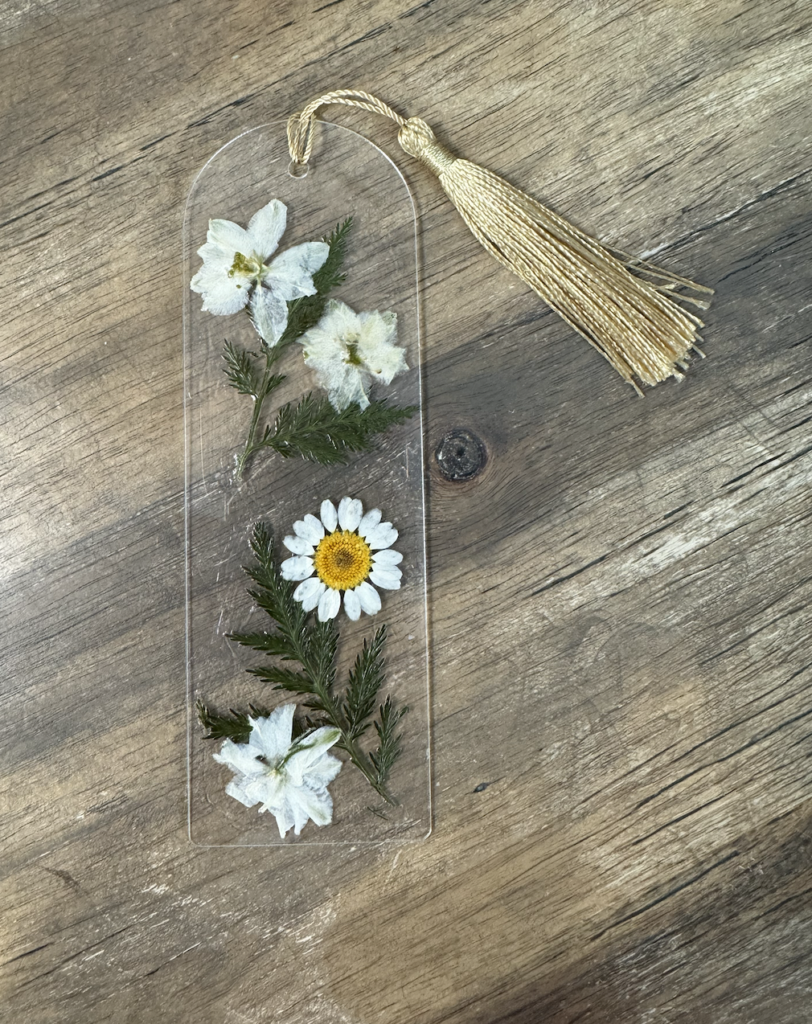
Step 5: Add the Tassel for a Fun Finish
Once your bookmark is dry and ready to go, it’s time for the final touch—adding the tassel! Simply tie a small knot at the top of the bookmark to attach the tassel. You can even experiment with different colors of tassels to match the flowers or give the bookmark an extra pop of personality.
And there you have it—a beautiful, handcrafted dried flower bookmark! This DIY craft is the perfect combination of creativity and thoughtfulness, making it an ideal gift for any occasion. Whether you’re giving it to a book lover, celebrating Valentine’s Day, or just want a cute keepsake to enjoy with a good read, this bookmark is sure to leave a lasting impression.
Make sure to try out different flowers, colors, and even personalized quotes for a truly unique bookmark each time. And don’t forget to share your creations with your friends—they’ll be just as excited as you are to try this simple and stunning craft!
For more Valentine’s day craft ideas, follow along for tutorials on candle painting!