Disclosure: This post may contain affiliate links. As an Amazon Associate, I earn from qualifying purchases at no additional cost to you.
Organize your kitchen stress-free with this how-to guide! Tackling organization and decluttering can be intimidating. However, following this step-by-step guide on how to organize your kitchen can make this task less stressful. By focusing on one area of your kitchen at a time, you can slowly make your way through each drawer and cabinet until your new kitchen is complete. I’ll share my favorite organization and storage solutions below, but you can also shop them all on my LTK or on my Amazon storefront!
STEP ONE: CHOOSE YOUR FOCUS AREA
First, choose a drawer or cabinet you want to focus on first (can be 1-2 of the same category) to organize your kitchen. By focusing on one small area at a time, your organization task will feel much less daunting. This also allows you to chunk out your organization time over the course of a day or even an entire week!
STEP TWO: DECLUTTER & DONATE
Next, take inventory of everything you have in your chosen category. Sort each item into 5 piles:
- PILE 1: KEEP
- These should be essential items that you use on a regular basis and are still in working condition. My rule of thumb is if something is taking up PRIME real estate (main cabinets, eye level shelf), it should be something used daily or at least once per week.
- PILE 2: MOVE
- We often store items in prime real estate when they are used very infrequently (i.e. specialty cookware; seasonal items; or backstock of pantry goods). To create more breathing room and make it easier on yourself to maintain the space on a daily basis, find a new home for those items. This may be the basement, a closet or cabinet that is a little further away, or designated space in the garage. For example, I have some specialty baking tools that we use less than once a month so I store those in a basement closet. It’s worth it to me to be a little less convenient once a month for me to have less clutter on a DAILY basis.
- PILE 3: DONATE
- It’s time to let go of duplicates of any tools in your keep pile, anything you haven’t used in over a year (because you probably don’t need it anymore), or speciality tools related to a hobby that no longer interests you. We often get trapped with the mindset of “what if I need it one day”… when you are aggressively organizing your kitchen, I like to ask myself “would I pay to STORE this item?” The cost is already a sunken cost meaning you cannot recoup it — but there is an ongoing (and often, very taxing) mental cost for maintaining and storing that item every single day that you can stop paying once you let go. Bless someone who can make better use of it!
- PILE 4: MAYBE
- These may be sentimental items you’re considering keeping or things you need to check with your kids or partner to see if they still need! It is easy to get stuck on this step and have these items live in limbo — be sure to make a decision the same day or just categorize this item into the keep / move pile until you are ready to let go.
- PILE 5: TOSS
- Include any broken items, things with missing parts that no longer function properly, expired foods, items you intended to make over or repurpose but haven’t touched in a year… I like to keep a BIG trash bag open right next to me when I’m decluttering (I LOVE these collapsible trash bag frames for decluttering!)
STEP 3: SORT
Next, sort all of your items into different categories. Sorting will help you determine how you want to store these items within your drawer or cabinet. This may look different depending on the items you’re working with, but here are some examples below.
- Utensil drawer: spoons, forks, knives, chopsticks, etc.
- Tupperware: round, square, rectangle, lids, etc.
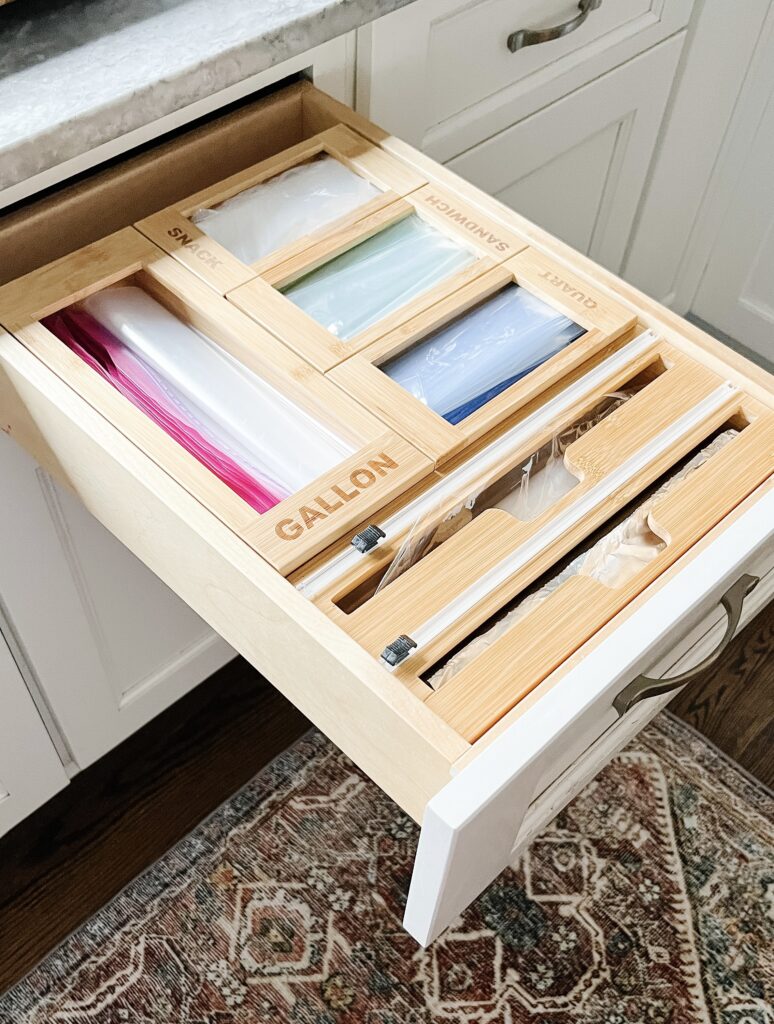
- Disposable food storage: sandwich bags, gallon plastic bags, plastic wrap, aluminum foil, etc.
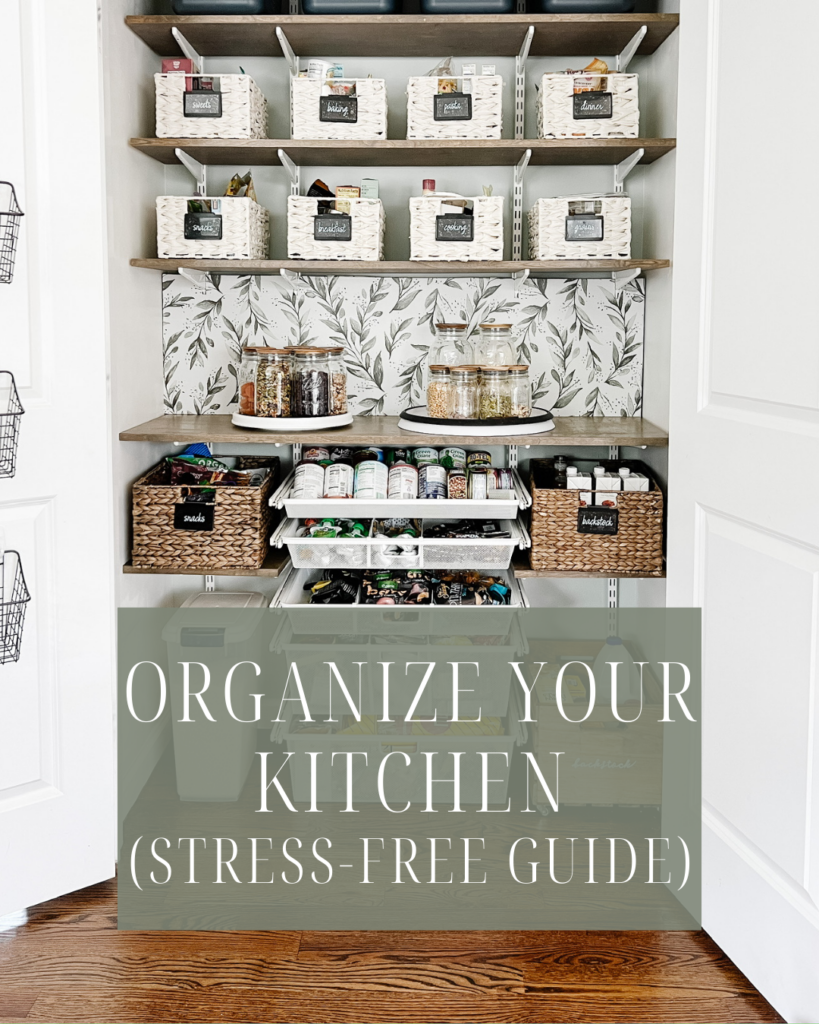
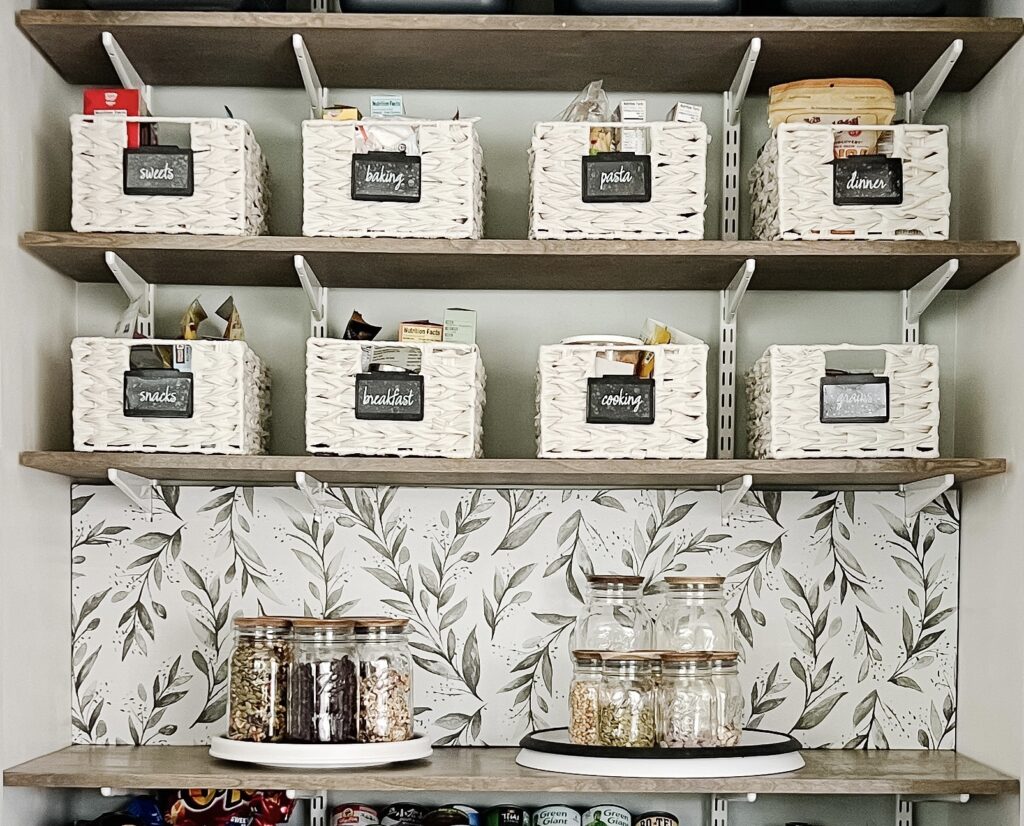
- Snack cabinet: sweet, savory, kid snacks, adult snacks, crunchy, candy, healthy, pre-workout, etc.
- Dry goods: baking (flour, sugar, cocoa powder), breakfast cereals, supplements, etc.
- Sauces: oils, vinegars, everyday use, once-in-a-while use, Asian, Italian, sweeteners, etc.
STEP 4: CHOOSE A STORAGE SOLUTION
Then, based on the items you’re organizing, you’ll want to choose the best storage solution. My rule of thumb is – everything should have a place! All of your items should be categorized in their own bin, jar, or slot so they can stay organized forever. TIP: don’t forget to measure your drawers or cabinets before you order the organizers to make sure they fit!
Check out some of my favorite storage solutions below:
- Use a drawer organizer for all of your utensil drawers! This helps keep your utensils categorized and organized so you can easily find whatever you need. You can find organizers in all sizes for your large silverware drawers to your smaller kitchen utensil drawers for spatulas, scrapers, whisks, spoons, etc.
- If you can’t find a pre-built organizer in the right size, try these adjustable drawer dividers that can fit to any size drawer.
- Put your dry goods in these glass jars! Transfer your flour, sugar, oats, etc. out of their original packaging that varies in size and color to these streamlined glass jars. This will allow you to easily stack and organize in your cabinets and will look great if you display them out in the open! The glass also allows you to easily check when you’re running low on supplies.
- TIP: use these easy open bamboo jar lids if you already have jars around the house.
- Transfer your plastic wrap and aluminum foil to these wrap organizers and plastic bags to this bag organizer. Not only do they look clean, but they ensure everything stays in their place.
- Organize your pantry and larger cabinets in their categories with storage bins. These are great for snacks, dry goods, cleaning products, and more!
STEP 5: LABEL YOUR CATEGORIES
The last step to organize your kitchen is adding labels to each of your storage solution categories. This ensures you, your family, and your guests can keep your items organized time and time again. Check out some of my favorite labeling systems below:
- My favorite bluetooth label maker is so easy to use and allows you to add labels to almost anything! This is a bestseller in the OHB community.
- These clip-on basket labels are perfect for basket organization systems in pantries and cabinets. They come with a chalk pen and you can erase/reuse.
That’s it! You’ve finished the hard work of a big reset of organizing your kitchen. Now, you’ll need to set up a system and routine to KEEP it organized. More on that next!