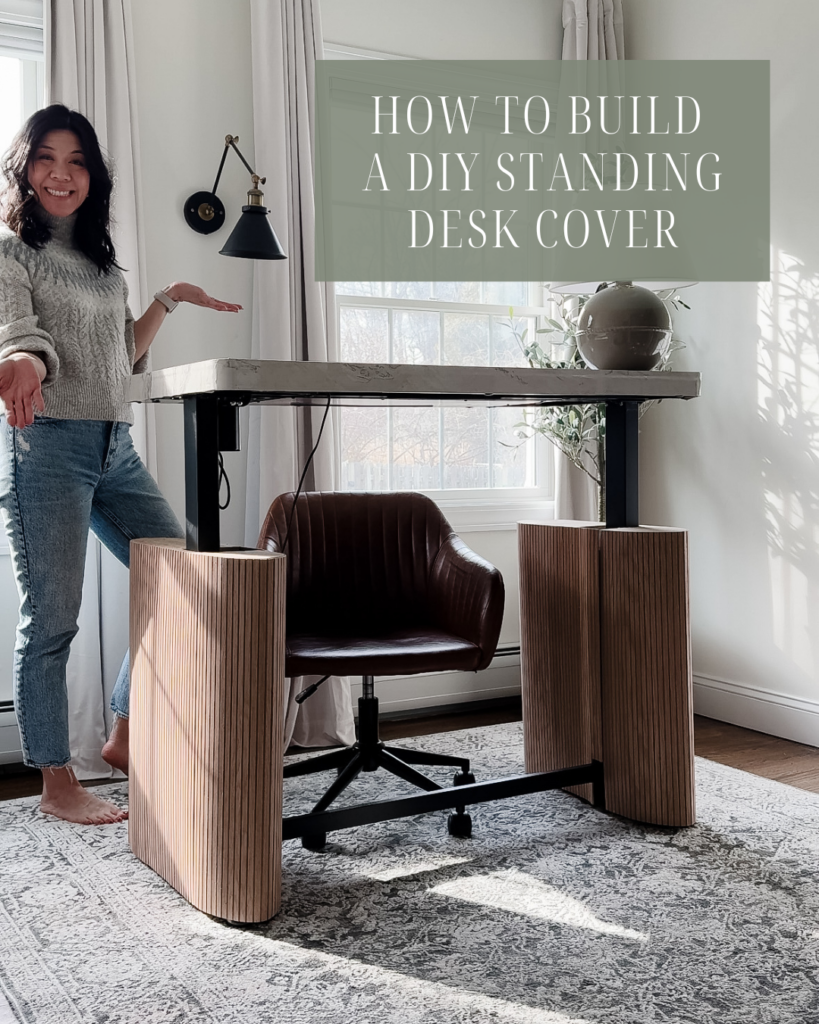
Overview
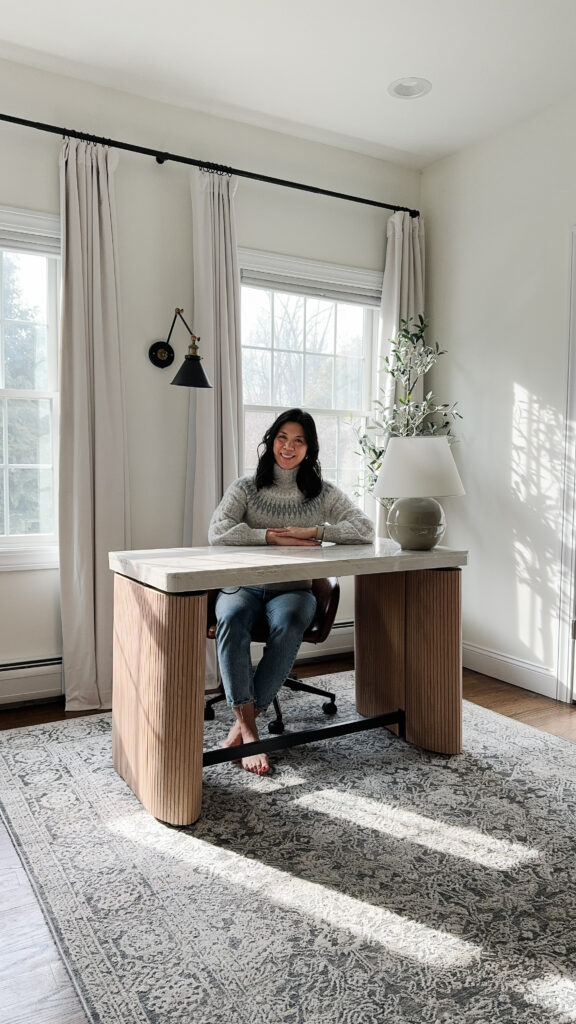
To spruce up a budget-friendly standing desk, build a DIY standing desk cover by measuring the leg height, cutting oval bases, assembling the bases with 2x4s, wrap the bases with pole wrap, stain and seal the bases, and add marble contact paper to the top. This DIY project offers a customizable and cost-effective solution to take a basic standing desk to a beautiful one!
For my home office, I wanted a standing desk so that I could alternate between sitting and standing / using my walking pad. The plain black standing desk didn’t fit into the overall aesthetic for the room so I wanted to transform it into a modern, stylish desk that was beautiful enough to be the centerpiece of the office. I had seen a beautiful standing desk by Rove Concepts (pictured below) but knew I could make something similar for a fraction of the price! So instead, I decided to buy a standard, plain electric standing desk from Amazon and build a DIY standing desk cover on a budget with this design as my inspiration. Follow along for a step by step on how I made this!

DIY Standing Desk Cover Materials:
- Flexispot Electric Adjustable Standing Desk
- Marble Contact Paper
- Duct Tape
- (2) 2 by 4 planks
- (2) Pole Wrap
- 3/4″ Plywood
- Measuring Tape
- Wood Glue
- Jigsaw (Dewalt) or budget-friendly alternative
- Miter Saw (Dewalt)
- Nail Gun
- Exacto Knife
- Wood Stain
Step 1: Measure the Leg Covering Height
Once you are comfortably sitting down, measure the height of the legs from the floor to underneath the tabletop. This step is important because once you add on the pole wrap, it will restrict the table from moving any lower so be sure it’s at a comfortable height when sitting in a chair. Save the settings on the table, too.
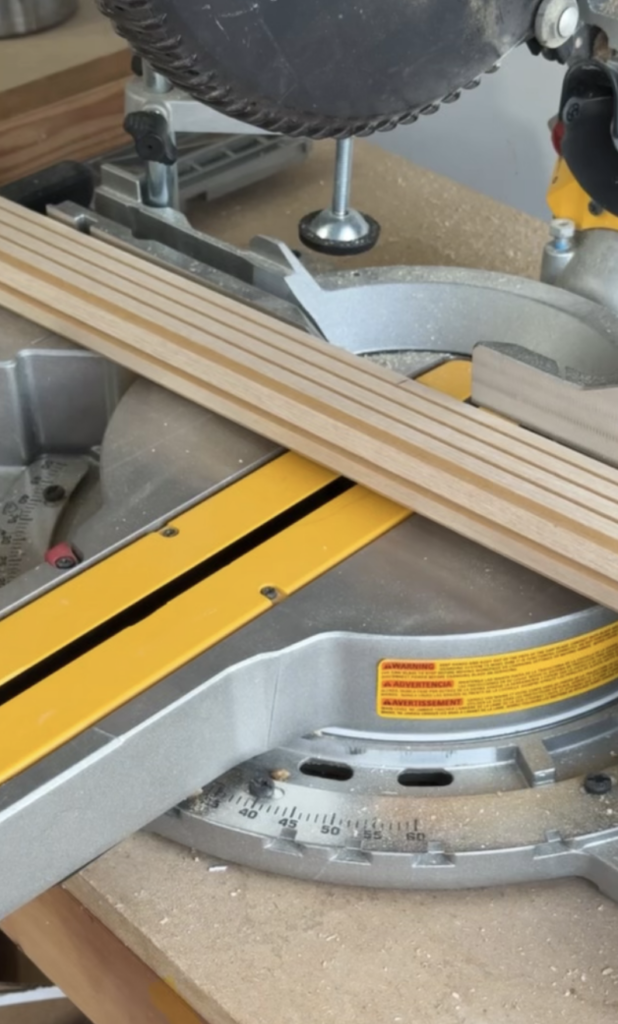
Step 2: Cut Oval Base
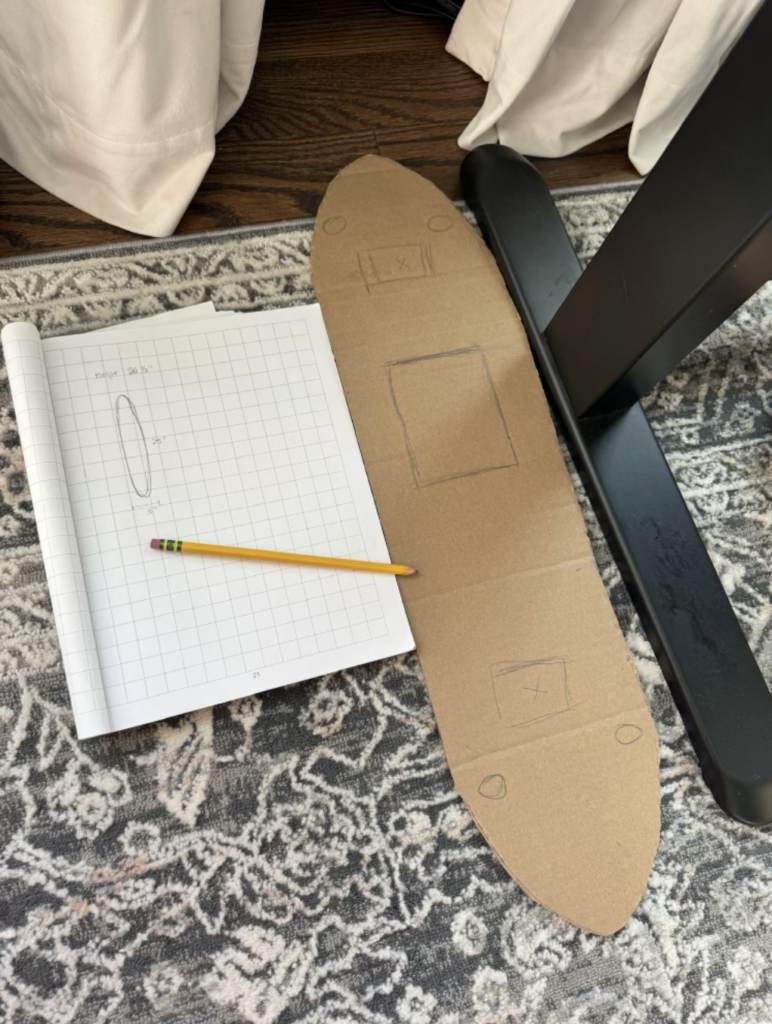
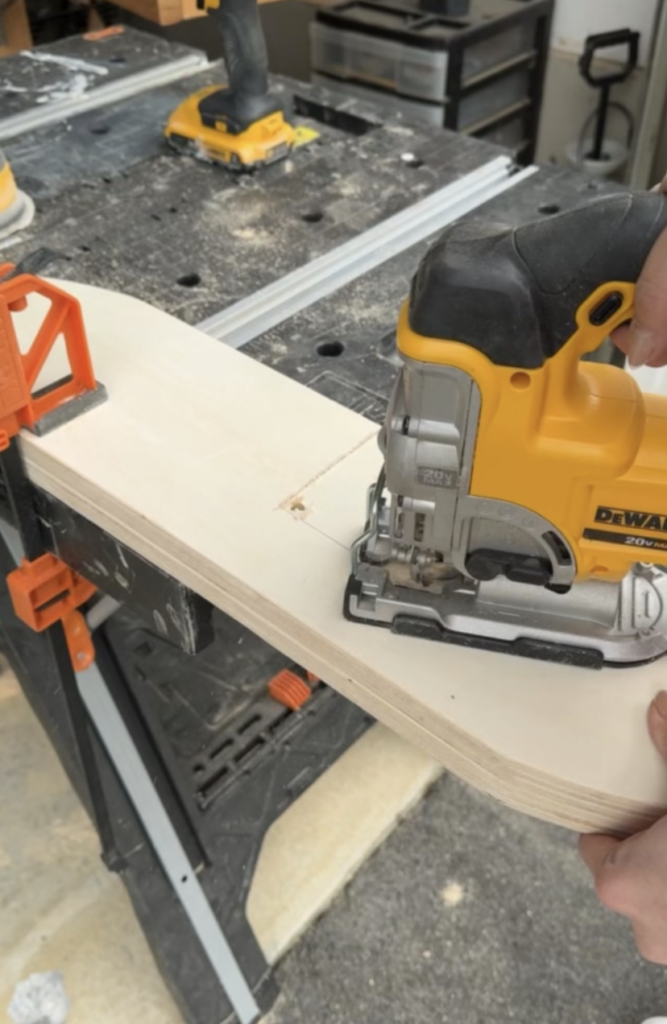
Use a cardboard scrap to create an oval template based on the measurements of desk legs. Make sure to measure the square cutout portion and mark where you want your vertical 2×4 support beams. Triple check for fit! Take the 3/4 inch plywood and determine the diameter of the table leg size to ensure the oval base is the right size. For reference, my oval base dimensions were 25″ width, 6.25″ depth, 27″ height, but feel free to adjust based on your own desk.
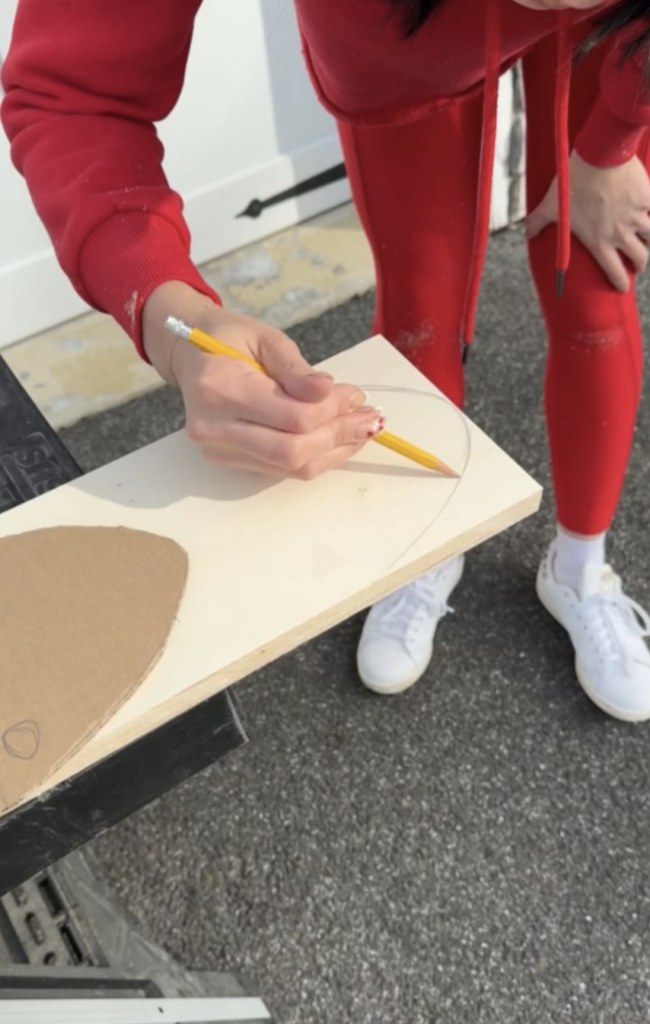
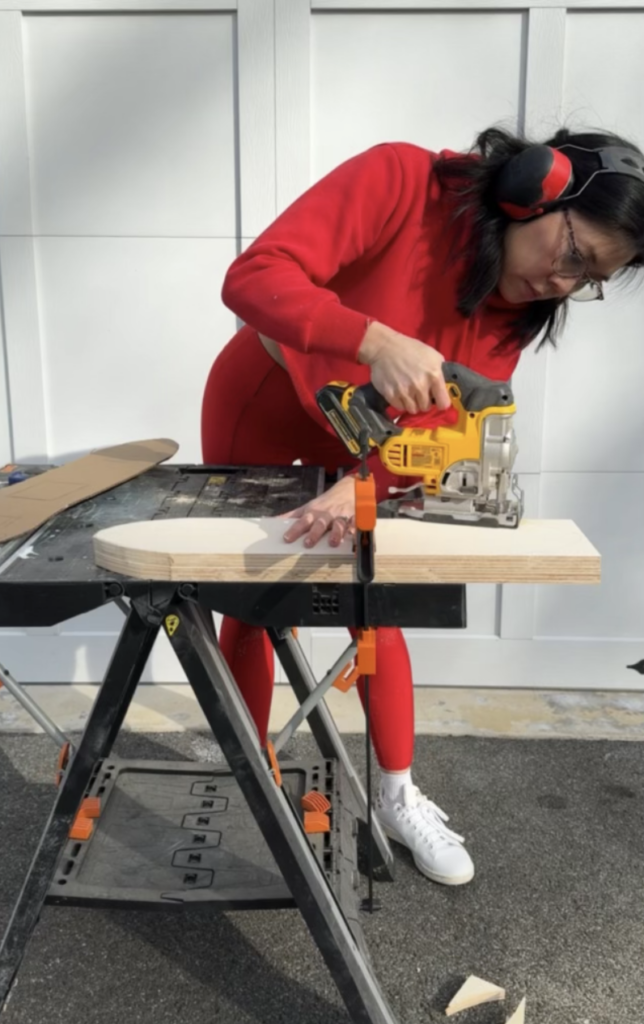
Then, trace the oval template onto the plywood with a pencil and use this as a guide to cut the oval using a jigsaw with a fine-toothed blade.
Once you have your first oval, use this as a guide to cut 3 more (to make 2 complete sets).
Step 3: Preparing the Ovals
To create the top and bottom ovals, take the 3/4″ plywood and use the jigsaw to cut the rounded edges.
Then, use the jigsaw to cut out the center square which will be used for the access hole for the moving legs. (Tip: bring this back inside to test that the shape and cutout fit around the desk)
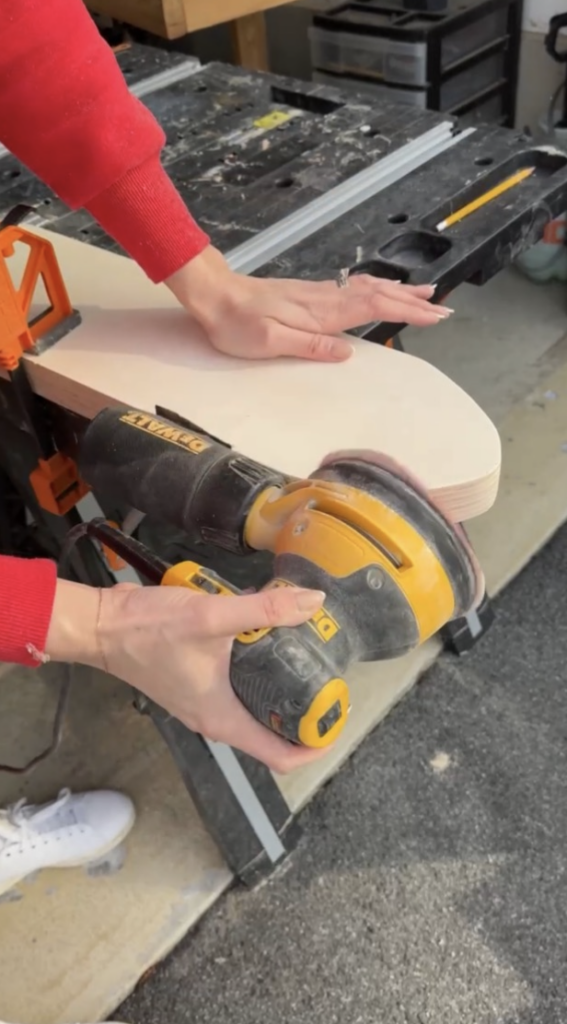
Use a palm sander to smooth out the edges of the access hole to prevent the table leg from getting caught – this will ensure the moving legs can move seamlessly.
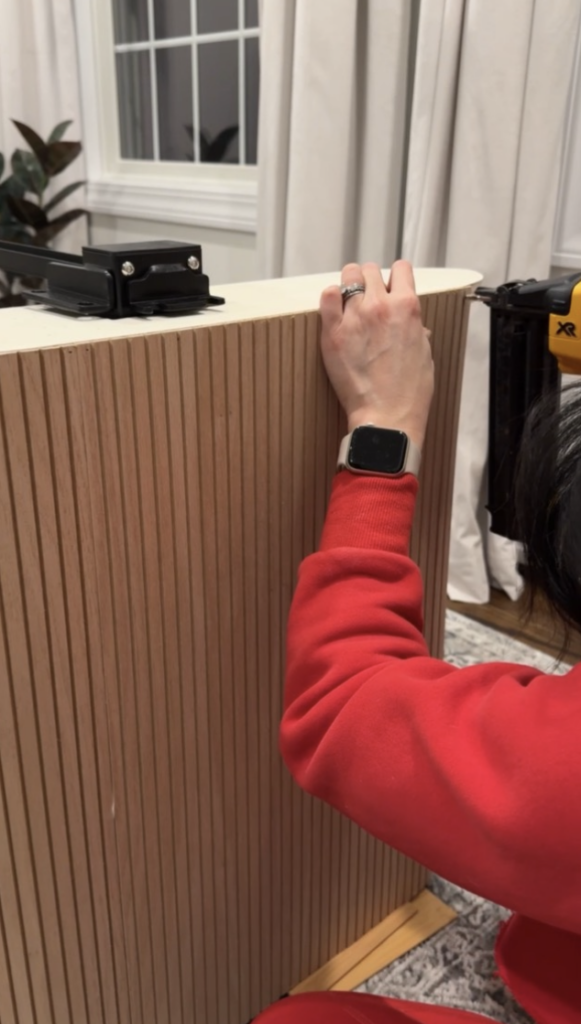
Step 5: Assemble the Base
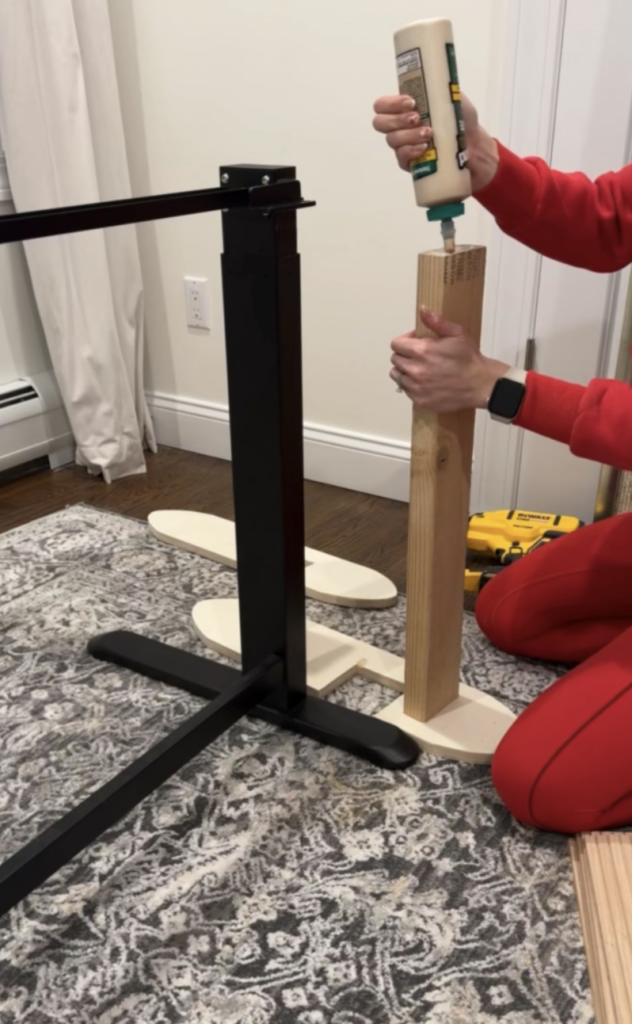
Take the two 2x4s that are cut to your preferred height, and use the wood glue to connect the 2×4 to the top and bottom oval bases by using a nail gun. Repeat this again with the 2nd 2×4.
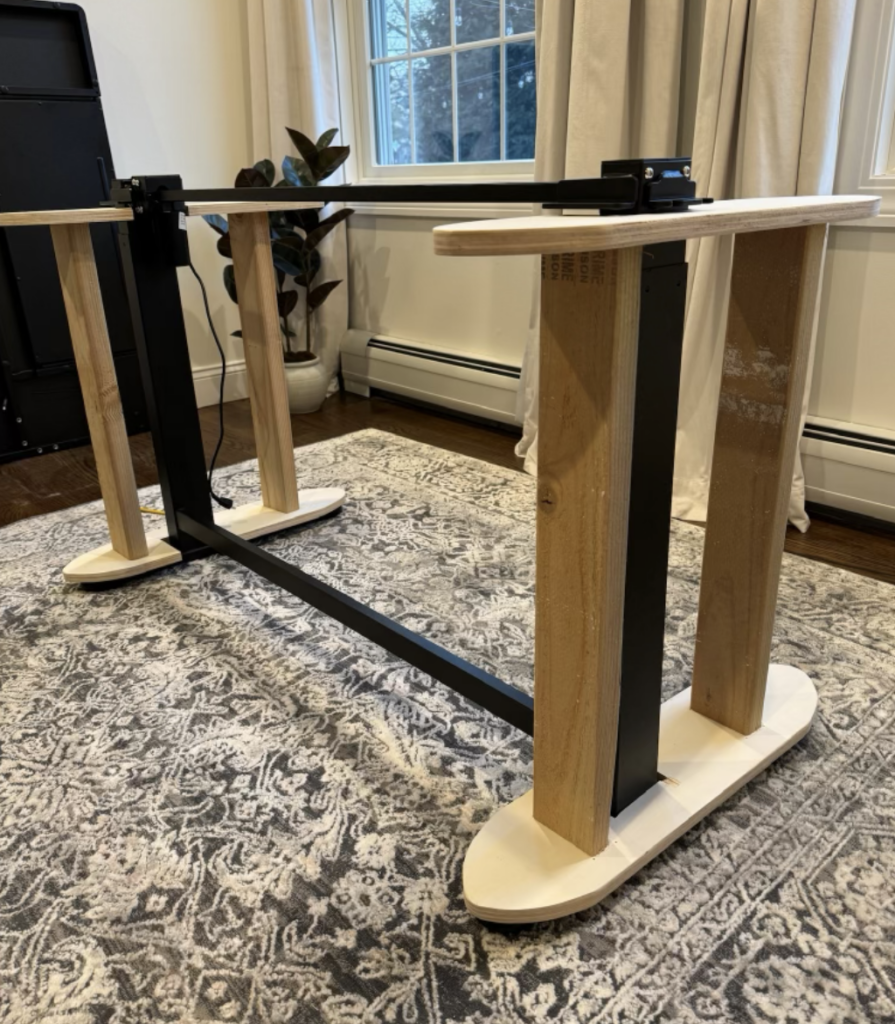
Then, repeat this step twice more on the other table leg. Check again for fit to make sure it can slide on easily.
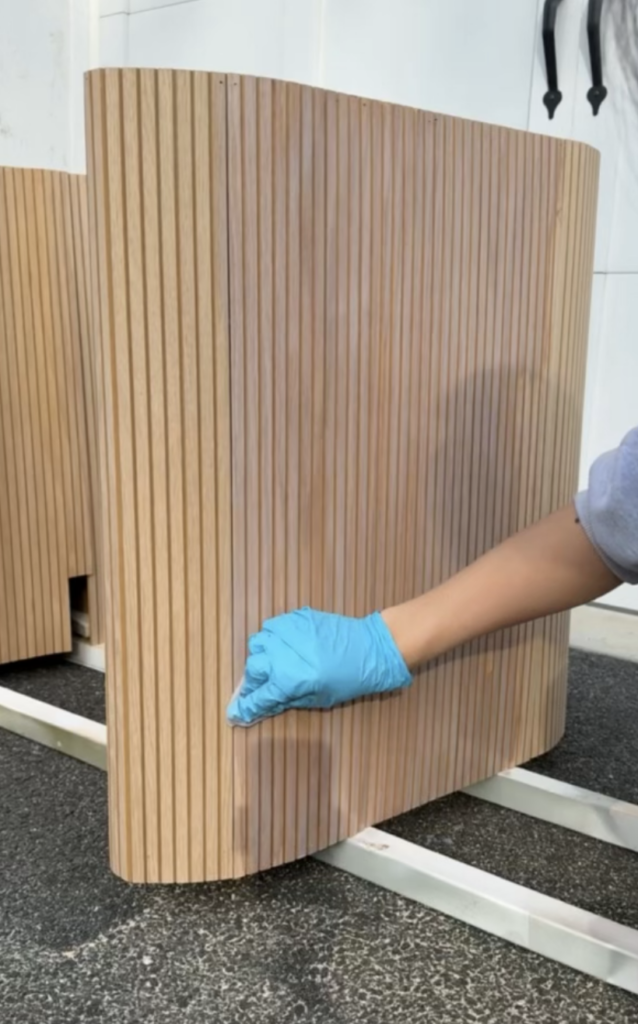
Step 6: Assemble the Pole Wrap
Measure and cut your pole wrap to fit your desired height. I used 3 different pieces per leg, 2 for the sides and 2 for the center connection point.
Step 7: Attach the Wrap to the Base
Use a nail gun to secure the pole wrap around the top and bottom oval bases. For any open seams noticeable on the pole wrap, feel free to add duct tape to the insides to close them up. (Note: I nailed them in sections but in hindsight, I would recommend lining all the sections of pole wrap up in a long line and securing them together with duct tape before attach to the bases)
Step 8: Stain and Seal the Pole Wrap
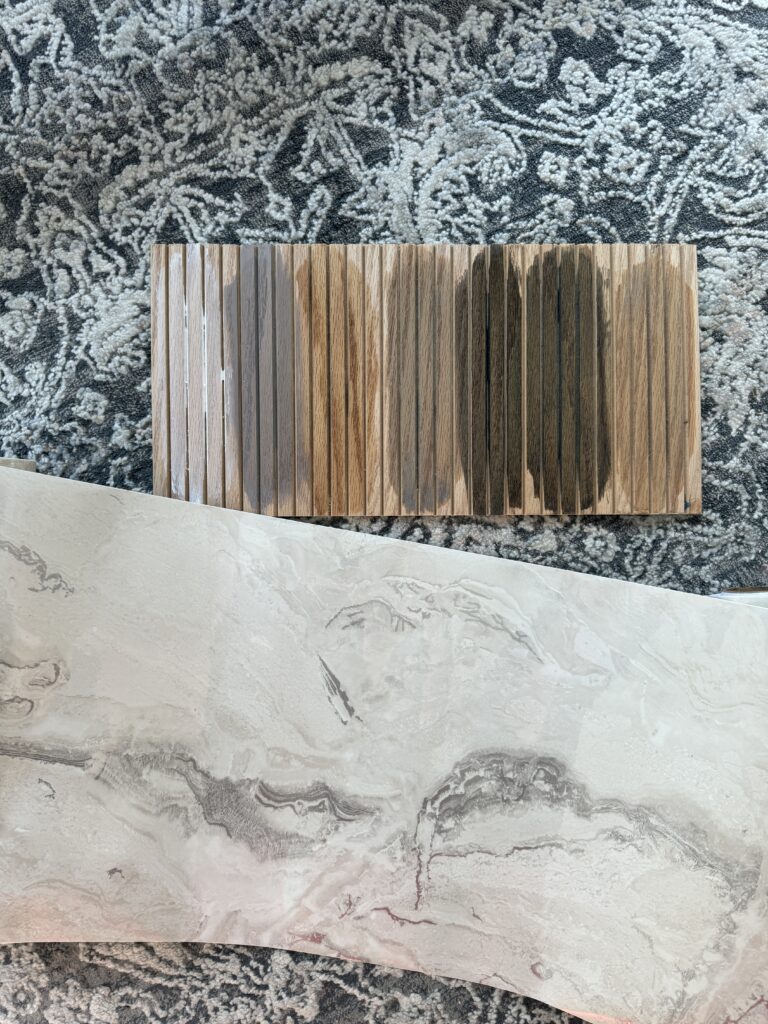
Once I was happy with the way the casing was built, I tested a couple of different Minwax wood stains. I ended up using a very light coat of Minwax Silvered Gray Semi Transparent. I finished by sealing the whole thing with Minwax Spray Polyurethane in Satin.
Step 9: Add Contact Paper
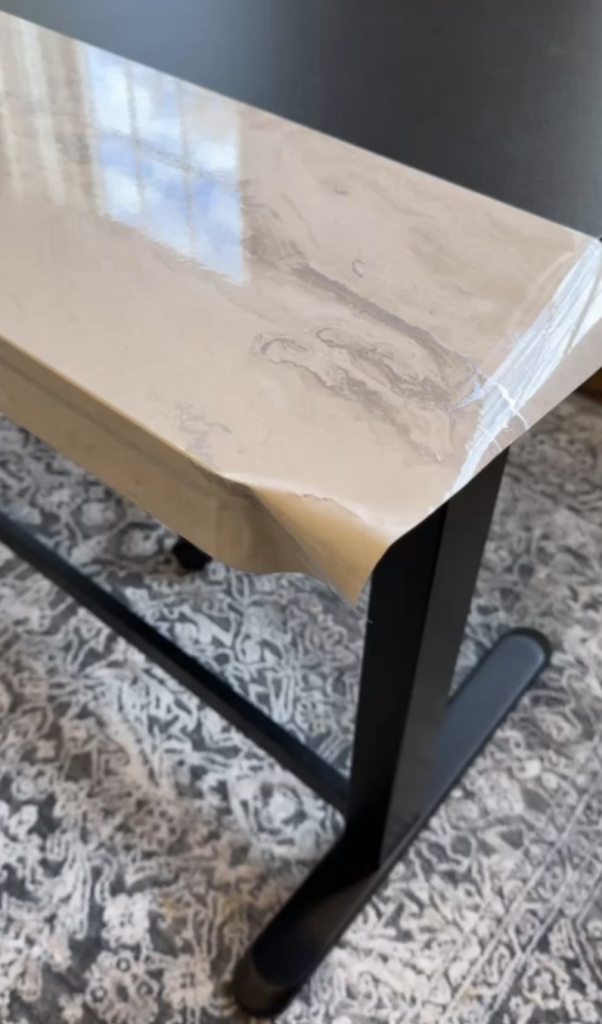
Once the bases are assembled, clean your table top and wipe dry. Apply the marble contact paper and use an exacto knife to cut and press the edges. It took a couple tries to get it just right – luckily the contact paper was forgiving so I was able to peel it up completely and start again. I also chose to cover the drawer for a more cohesive look.
Drop any questions below. Thanks for reading along!