Our two girls share a room – and the dresser they’ve been using is a hand me down Crate & Barrel dresser from some friends. While it was in really good condition, an unfortunate accident during the move resulted in the drawers falling out and getting damaged.
During that move, a helper who shall not be named asked if he should just take it to the dumpster because it was in “shambles.” The image in my mind was a million shattered pieces so I said, well, if it’s that bad then… yeah of course. Turns out, the dresser was 95% fine: a couple of drawer fronts had fallen off and I managed to screw them back in. This was my first attempt at “furniture rescue!” It was nicknamed it the “shamble dresser” and it has served our girls more or less faithfully for the past two years.
However, the design of this dresser is majorly faulty: extremely heavy drawer fronts connected by wood screws. With two young children opening and slamming this pretty aggressively on a daily basis, this poor dresser didn’t stand a chance. Finally, three out of six drawer fronts fell off — adding chaos to an already chaotic clothing organization situation… with no place to put Ellie’s pants (see Exhibit A to right of dresser), no place to put Lea’s shirts (see Exhibit B on floor in front of dresser)… you get the drift.

Picking a New Dresser
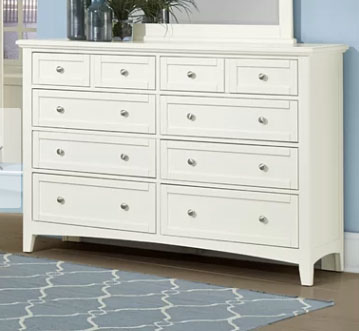
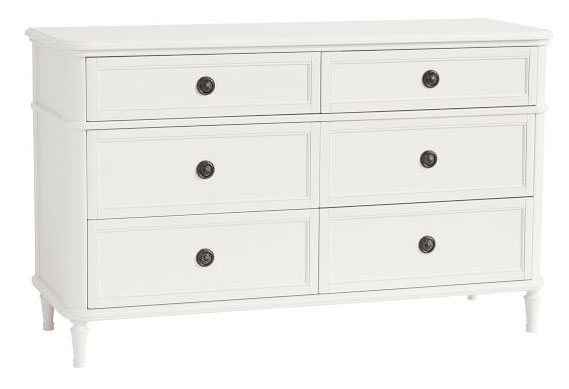
IT WAS TIME FOR A NEW SOLUTION. I researched new dressers and the ones I liked were all $$$… some mid-priced ones and some higher-end ones:
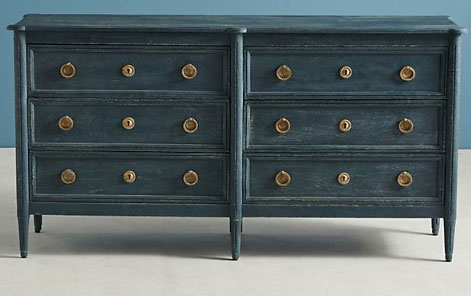
My thriftiness kept bringing me back to my local Habitat for Humanity ReStore and browsing Facebook marketplace… when I came upon this listing:

While I’ve never refinished furniture before, I knew this had potential to be a really cute and unique piece for the girls’ room. I visited the store (which happens to be NJ’s largest antique store – more on that another time!), negotiated them down to $80, debated about whether it was worthwhile since the quality wasn’t as great as I was hoping (I was looking for dovetail joints — something you should look for as a sign of high quality construction). BUT, for such a low price, I figured it would be a fun project even if we don’t end up keeping it for very long!

Picking the Paint
I’ve used can spray paint to refinish two Crate & Barrel ladder bookcases in my home office… and I was going to go that route again with this piece for ease of clean up. Because I was crunched for time and Sherwin Williams happened to be close by, I stopped in and decided to go with real paint for two reason:
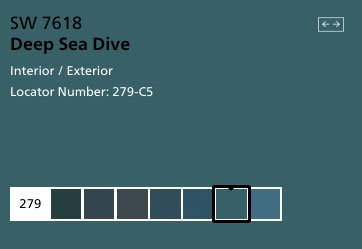
(1) COLOR SELECTION: Spray paint comes in a pretty limited color selection. I was going to go with Rustoleum Maui Blue but it just didn’t feel quite right. Going with real paint means the world is your oyster! Instagram polls were a dead heat at 50/50 white vs. teal for the color. The rest of our home is very white/gray/neutral. But, since this was more of an experiment than anything and my girls love all things rainbow and bright, I opted for teal (my oldest daughter Ellie’s favorite color). I picked Sherwin Williams Deep Sea Dive which is a medium-toned turquoise in the gloss finish.
(2) FINISH QUALITY: Can spray paint is great for small jobs and things that won’t be touched and used frequently. Learning from the shamble dresser, I wanted a finish that would be more durable. The rep at Sherwin Williams recommended the Emerald Urethane Trim Enamel which dries into a strong, hard finish that can withstand a lot of wear and tear. Now, this was not cheap – it was ~$30 for a quart… but that’s all I needed for the entire project (with some to spare). Also, Sherwin Williams is having a 30% off sale right now – and I just learned of a genius sale hack: you can buy the paint you want UNTINTED now during the sale and just save it… when you are ready to pick your paint colors, bring it back and they will tint it any color you want for FREE.
Prep (aka Don’t Skip These Steps)
For other spray paint projects, I’ll be honest that I didn’t clean or prep super thoroughly. Since I really wanted to ensure a smooth finish, I took extra precaution:
(1) Deep Cleaning: There was a bit of odor (not too bad) so I wanted to give it a good scrub and natural deodorizing treatment with good ole 50/50 vinegar + water mix. I took out all the drawers, sprayed it with the solution, wiped it down, and let it air dry in the sun… and repeated this whole process again. I also sprinkled a heavy dose of baking soda inside to absorb any lingering odors. I let it sit for about an hour and then vacuumed it up.
(2) Sanding: The rep at Sherwin Williams said I did NOT need to prime or sand this piece since it already had paint on it (even though that paint was shiny). Think of it like putting a second coat of paint on your already painted walls. But, this piece had been spray painted before and there were some spots that had pooled paint and some other areas that had a few dents, so I sanded the top and sides with 80 grit.
(3) Final Prep: I did another wipe down with the vinegar + water mix to clear off any sawdust from sanding. Then, I wiped down the entire piece (getting into every little nook) with tack cloth, which is a tacky/almost waxy feeling cloth that grabs every last particle of sawdust that might make your finish bumpy.
Test Run of the Spray Paint Gun!
First time spray paint gun user here and I AM IN LOVE. It is SO easy, SO fun, and I’m SO impressed with the results. This is the specific one I used:
I read through dozens and dozens of reviews of various spray guns and found this to the perfect mix of quality and value for an avid DIYer. You just pour the paint into the cup, dilute with about 10% water (use manufacturer guidelines here for the specific paint/product you’re using — this is what the Sherwin Williams rep told me to do)… hook up the tubes — and spray! I did a few trials on cardboard just to get the hang of things and then quickly got to work. Spray paint guns are awesome for smooth, even finish; speed; and getting paint evenly into nooks and crannies (like the bamboo detail of this dresser). Now I want to spray paint ALL THE THINGS.
I did two coats – letting the first dry completely overnight and sanding in between with 180 grit sandpaper (because that’s all I had so I tried to be gentle!) – I read you should use 220 grit.
Polishing Hardware

The brass hardware was pretty dark and dingy and I wanted to clean it. I researched a few options and landed on boiling the hardware in white vinegar for a few seconds (turn heat off immediately) and then buffing it out with “0000” steel wool pads. A little elbow grease and … voila!
There is permanently attached hardware on the corners of the dresser and plain steel wool (without the boiling in vinegar step) wasn’t doing much. Another cleaning method suggests applying a layer of ketchup and letting it sit for an hour before cleaning. The vinegar interacts with the metal to “loosen” it similar to the boiling in vinegar step. I let it sit for about an hour and used the steel wool pads to buff and it worked like a charm.
The Reveal!
So, how does the final product look? Here’s the final photo!

I just ordered some fun contact paper to line the drawers and will put them in when they arrive. I’m so excited to install in the girls room next week. Stay tuned for their room refresh!

This is amazing!